The target below is a felt-tip alien on a sheet of printer paper. That is the point: the app does not recognise targets, it scores the boxes you draw. A cardboard box, a steel plate, a photo taped to a wall and a proper IPSC silhouette all work the same way.
The short version
- Pick 📸 Custom (photo) from the target list, then Set up custom target.
- Frame the target and Snapshot it.
- Tap around it to trace the hit box, then Add hit box.
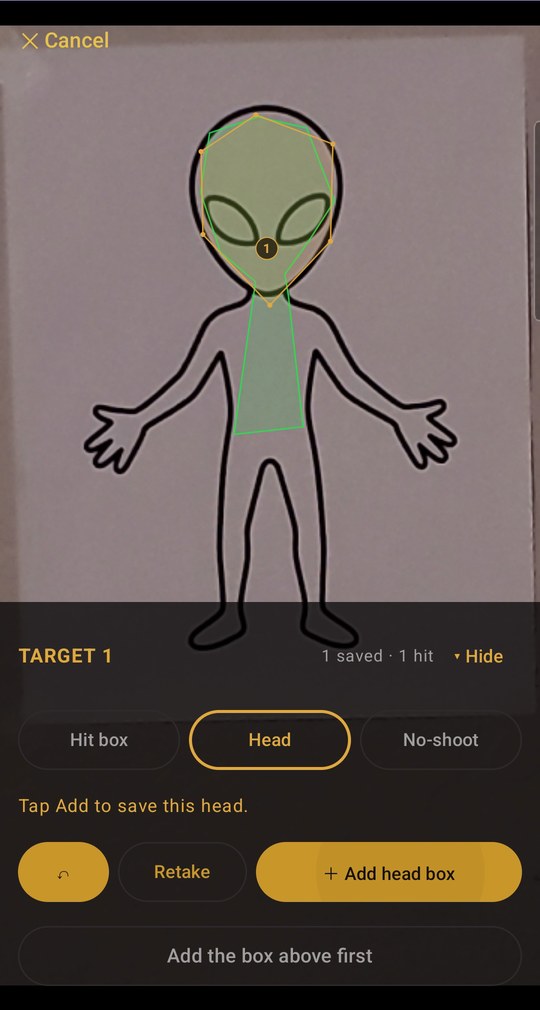
- Switch to Head, trace the head, Add head box.
- Done with target 1, then Finish.
That is the whole job, and it takes about a minute. Everything below is the same five steps with the reasons attached.
Step by step
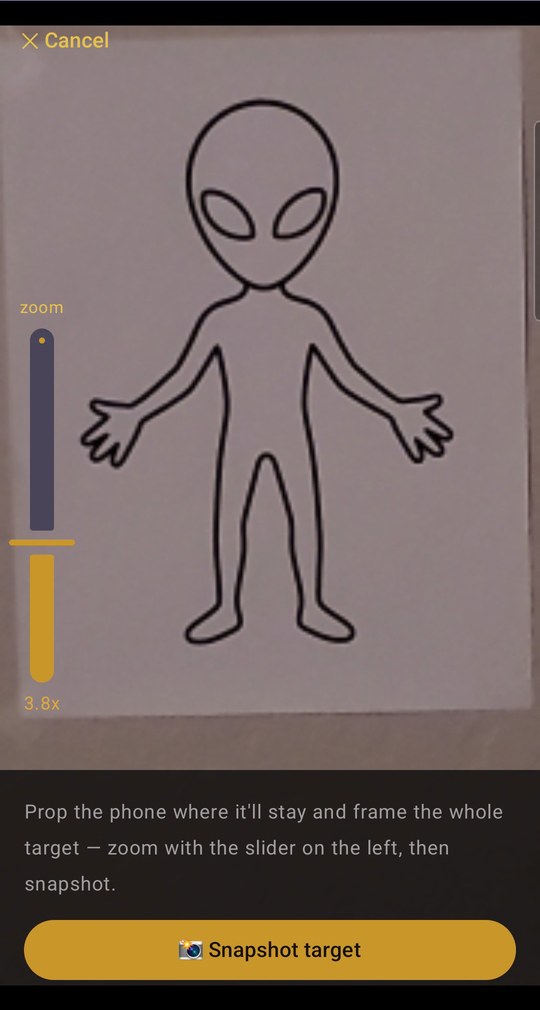
1 Frame it, then snapshot
Prop the phone where it is going to stay. The snapshot becomes the target, so the trace only lines up with reality while the phone sits exactly where it sat when the photo was taken. Set it down first, frame second.
The zoom slider on the left fills the frame with the target from wherever the phone ended up. Fill it generously — a target that is a third of the frame is a target traced with a third of the precision.
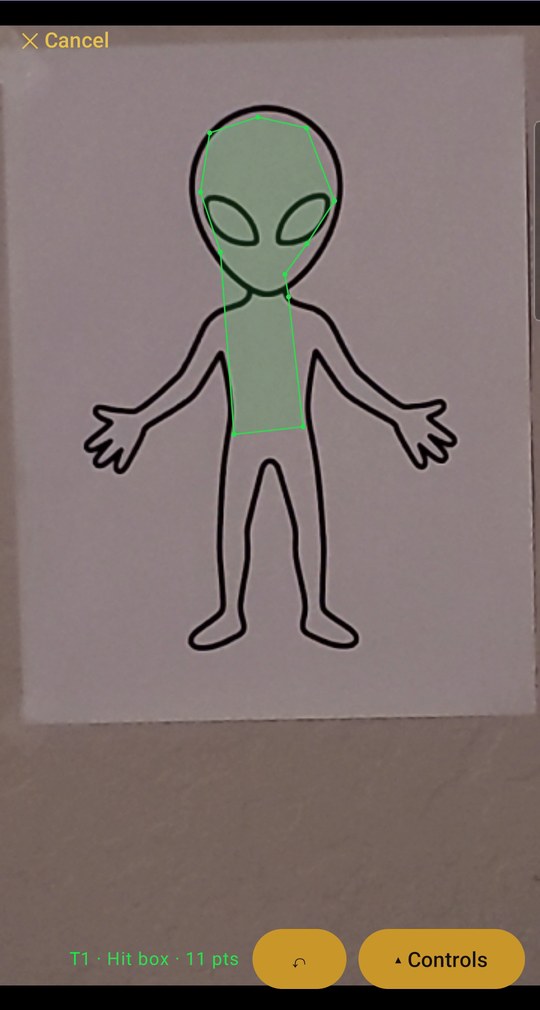
2 Tap around the hit box
Tap corner to corner around whatever should count as a hit. It needs at least three points; the counter at the bottom (T1 · Hit box · 11 pts) tells you where you are, and the undo button drops the last one.
Follow the shape rather than boxing it in. Every tap is free, and the traced area is the difference between an arm strike scoring and not.
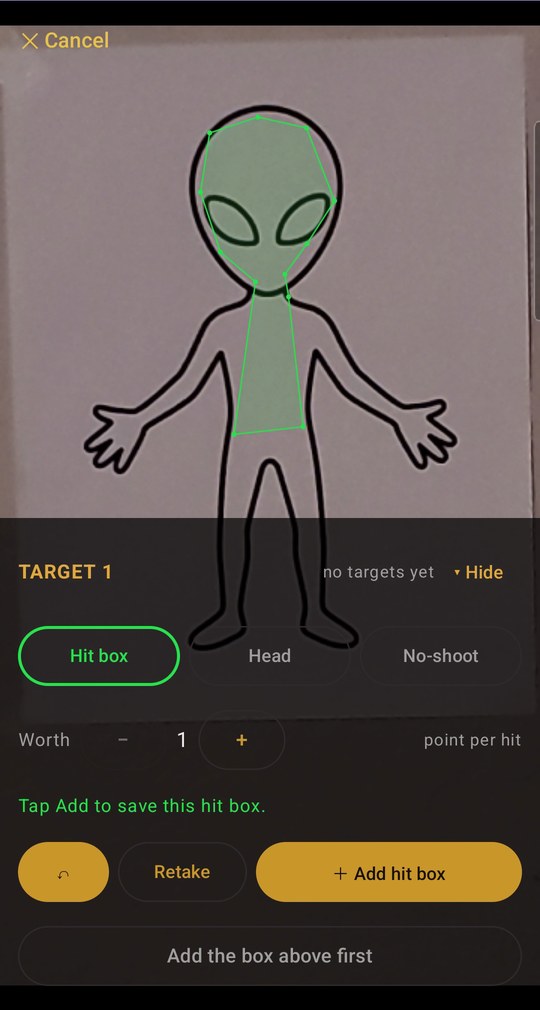
3 Say what a hit is worth, then add it
Worth sets the points a hit in this box pays, from 1 to 20. One is fine for most things; raise it when a photo holds several targets and you want the hard one to pay for itself.
Nothing is committed until you press + Add hit box. Up to then you can switch tabs, undo points or Retake the photo outright.
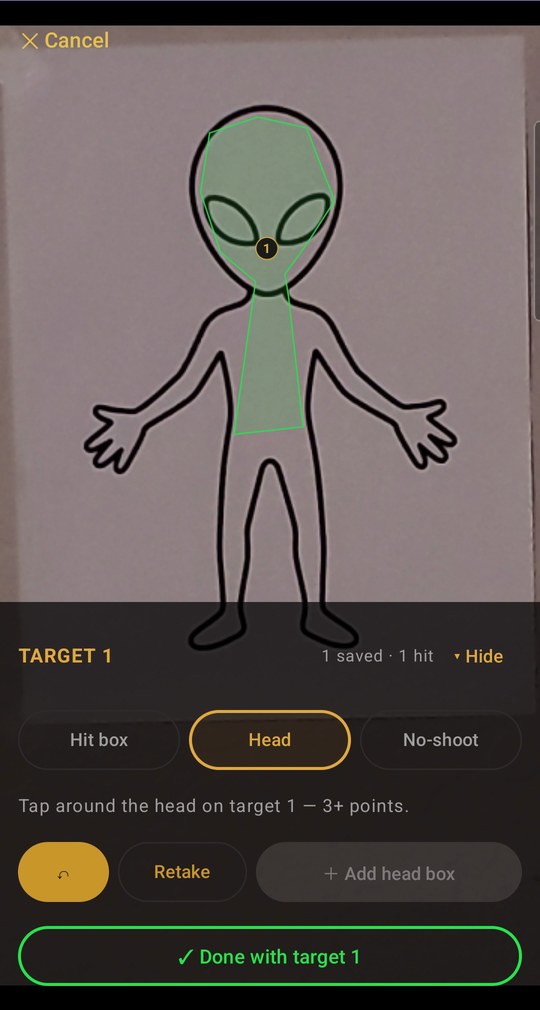
4 Add a head box
Switch to Head and trace it the same way. A head is always worth 10, which is why the Worth control disappears on this tab — the drills and the hub all agree on what a head is worth, and a target that disagreed would break the rules built on it.
Draw it right over the hit box. The head is the more specific claim about those pixels, so it wins the overlap — and rules like two head shots to put it down can only work if a head shot is not quietly scored as a body hit.
5 Save it
+ Add head box lights up at three points. The tally at the top of the panel counts up as you go — 1 saved · 1 hit · 1 head.
The third tab, No-shoot, works identically and is the reason this beats a printed sheet: a hostage, a bystander, the wrong door. A no-shoot never scores, it beats every other box in an overlap, and the hit comes back flagged as a no-shoot so a drill can end the run on it.
6 Finish — or add another target
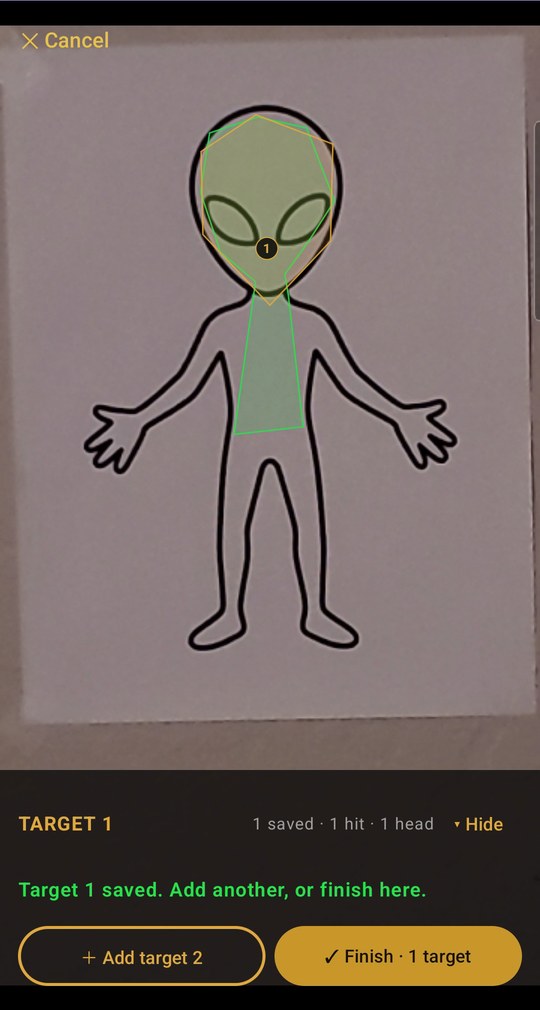
Done with target 1 closes that target, and only then are you asked whether the set is finished. Two questions, because they are two decisions.
+ Add target 2 puts a second, separate target in the same photo — three mannequins on one wall, three targets. In Solo any of them counts; in a duel the first is player 1 and the second is player 2, which is how one photo becomes a head-to-head.
7 That was the calibration
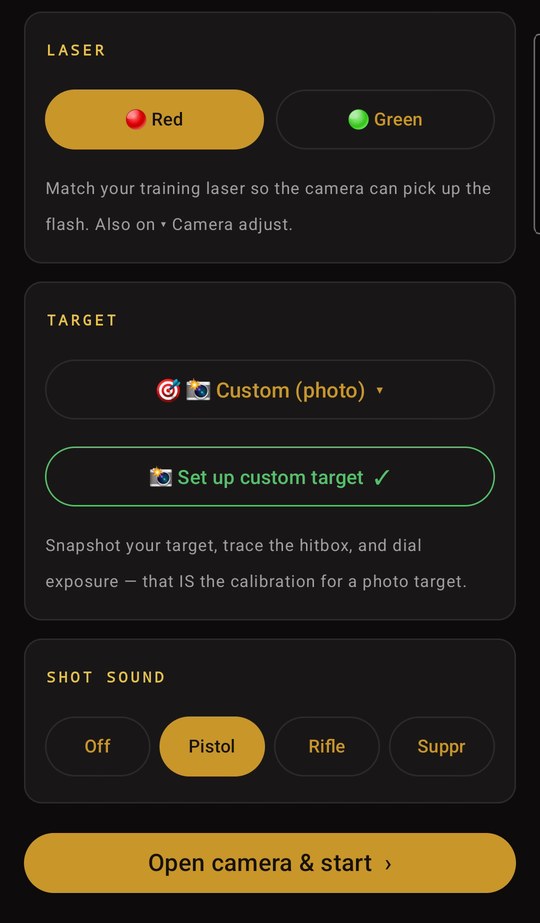
Back on Setup the target reads 📸 Custom (photo) and Set up custom target ✓. There is no separate calibrate step for a photo target — snapshotting it and tracing it is the calibration, because the photo already fixes where the target sits in the frame.
Which is the flip side of step 1: move the phone and the trace is wrong. Nudge the tripod and run it again. It takes a minute.
8 Shoot it
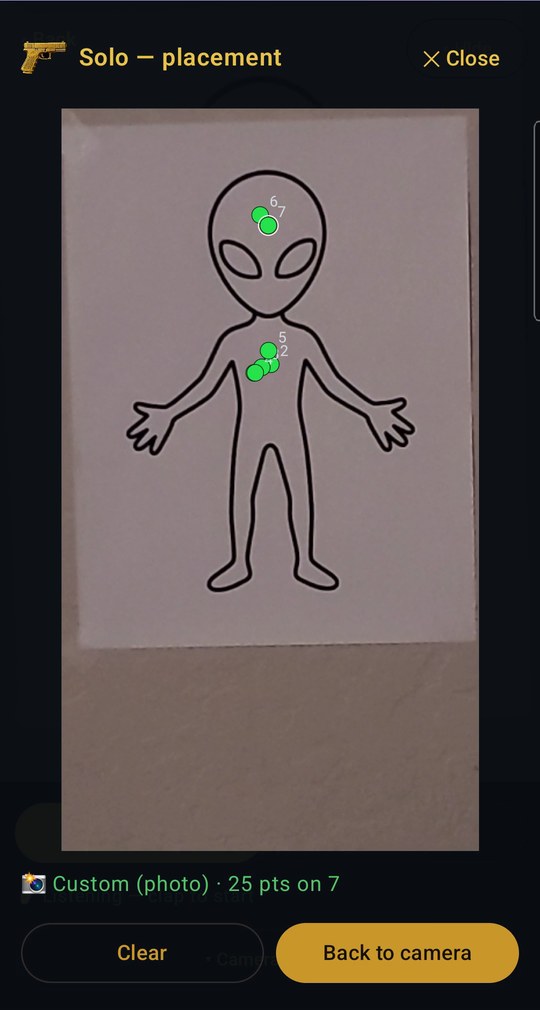
Hits plot on your own photo, in the order they landed. Five body hits at a point each and two in the head at ten — 25 pts on 7.
From here a custom target behaves like any printed sheet: Free Practice, Showdown and a Shoot House room all take it. The exceptions are the modes whose rules are a particular sheet — the named standards (Bill Drill, El Presidente, Gold Card), the scripted scenarios, and Defuse and Call Out, which need the bomb vest and the dot sheet to mean anything.
Getting a good trace
- Light the target, not the room
- The camera has to see your laser flash against the target, and a bright target with a dark surround is the easiest version of that. Exposure is tuned under ▾ Camera adjust on the camera screen, and it matters more than the artwork does.
- Dark targets are fine
- A dark target does not detect worse. An overexposed one does — and so does one shot with the gain wound up, because raising ISO raises the noise floor and buries the marginal hits. Reach for exposure before ISO.
- Trace tight, not generous
- A box drawn well outside the target scores near-misses as hits, and you will never know it happened. The plot only tells you where the round landed on the photo, not whether your box was honest.
- One photo, one position
- The trace is tied to the snapshot, so it is tied to where the phone was. Moving the phone, or a target that swings, means retracing.
Still stuck? Support & troubleshooting covers the things that usually go wrong first, or report a bug if something is genuinely broken.